No products in the cart.
Is Your Dana 44 Vent Destroying Your Axle?
Did you know that your axles breathe? Yes, axles breath every time they are used. As your ring and pinion spin round and round, they heat up the lubricating gear oil. Now, for those who may have forgotten high school chemistry class, when matter heats up, it changes volume. So as he gear oil expands, where does it go? If you have ever filled your own axle, you know that it is only ever filled part way. The remaining volume is left empty, one reason for this is to accommodate the expansion of the oil. As the oil expands, it needs to displace the air in the axle or the axle would become over pressured and blow gear oil out the seals in the axle tubes and pinion.
We know that the heat expansion wants to pressurize the air in the axle, so we can begin discussing how we prevent the pressurizing of the axle with the use of the vent. Every time the axle is used, air moves in and out through the axle vent. This air movement allows the system to heat and cool without us even knowing it. How many times do you think to yourself, “gee, my axle must be getting warm”. Most likely never. What is critical is that the only thing coming and going from your axles is air. This is where the Dana 44 vent breather system may or may not be helping. The Dana/Spicer corporation has put the breather vent on the axle in many locations over the years. Some of these locations are great, others not so great. So let’s get started on vent location.
The aft axle tube on the mid-plane as a small hole:
This is probably the worst location the axle vent was ever located. In fact, some consider this the mythological vent location because it is actually pretty rare to find an axle vent in this location. You are probably going to find it on a housing pre-1970. First, the vent did not have a rattle valve on top of it, it is merely a 1/16 inch hole drilled into the tube. It is very susceptible to being clogged by mud and debris. What makes this vent hole even more troublesome is the fact that it is relatively low on the axle and if you plan on driving through any kind of mud or water, get ready for ingestion of mud and water by your axle. Folks with this version of the Dana 44 should definitely be draining and refilling their axle after any kind of liquid exposure because the gear oil can readily turn into a chocolate milkshake after wheeling. The contaminated gear oil will immediately begin to erode your ring and pinion, carrier bearings, and pinion bearings if left to its own self destructive behavior. If your axle really gets filled, the ingested water will begin corroding axle tubes from the inside out, as well as bearings. Once the corrosion and erosion starts, plan on a complete rebuild because it will destroy everything in the differential.

Upper axle tube:
So this Dana 44 axle vent is very similar to the first one described but is in a different location. This vent hole is located on the top of the axle tube either as a blind hole or threaded to accept a breather valve. This vent is about 1.5 inches higher than the aft axle tube vent but is not substantially better if you have the drilled hole version without a breather valve of some type. What makes this vent location intriguing is that if it is located near the differential housing, it is located in the area of highest compressive bending stress in the axle tubes, maybe the engineer was at lunch the day they placed this one or just the cheapest to manufacture. The best version of this vent is often mated to the rear axle brake line T-fitting with either a rattle valve, or even better, a raised vent tube. This version is actually pretty common and found on a number of late model Jeeps with a OEM vent fastener for the brake block. If the vent is extended via a tube, its actually not that bad of a location, but there are better options. If you decide to truss your axle, it may be time to reconsider eliminating this vent because it is highly likely it gets blocked.

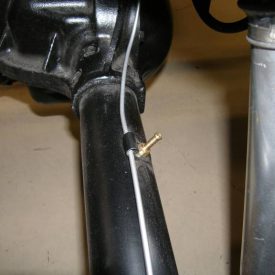

The Dana 44 diff cover vent:
When located on the upper area of the differential cover, this vent location can be an excellent option because it is located much higher than axle tube vents and usually can be easily modified for numerous different vent or valve types. It is also very protected being on the aft side of the axle. Things will get difficult when moving from one type of cover to another. You will need to make sure your new cover has the accommodation for the vent or you will have to modify it yourself. Finally, the biggest downside to this vent location is when it is in-line or near the oil sling path of the ring gear. If located in the oil sling path, expect oil to escape this vent every time you drive. If you notice oil escaping, you will need to keep close tabs on the oil level because the ring gear will keep slinging oil out until the differential is empty.

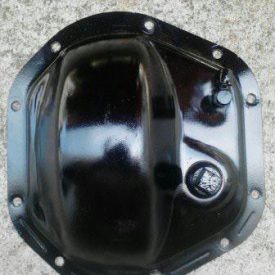
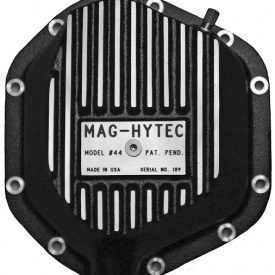
Upper Diff Housing
Having the breather vent on the top of the Dana 44 is the best place to have it, especially when it is located on the offset flat above the pinion gear and pinion gear internal block flange (some Dana 44s). This will naturally keep oil from being slung out the vent while providing the highest possible location on the axle. It is also centered to the axle, which means that it will experience the least amount of tug when your suspension is flexing over obstacles. What makes this location a huge winner is that it is exposed to the least amount of collision potential with trail obstacles. Dana Spicer made this location the standard for the Dana 44 on quite a few versions. This vent also provides for unlimited options for valve and tube vent adapters. It is often the only vent location that allows for safe installation of the sealed volume accordion style vent breathers that can allow for axle air displacement while keeping all dirt and water out of the axle assembly. We believe this vent to be the most winning location of them all.
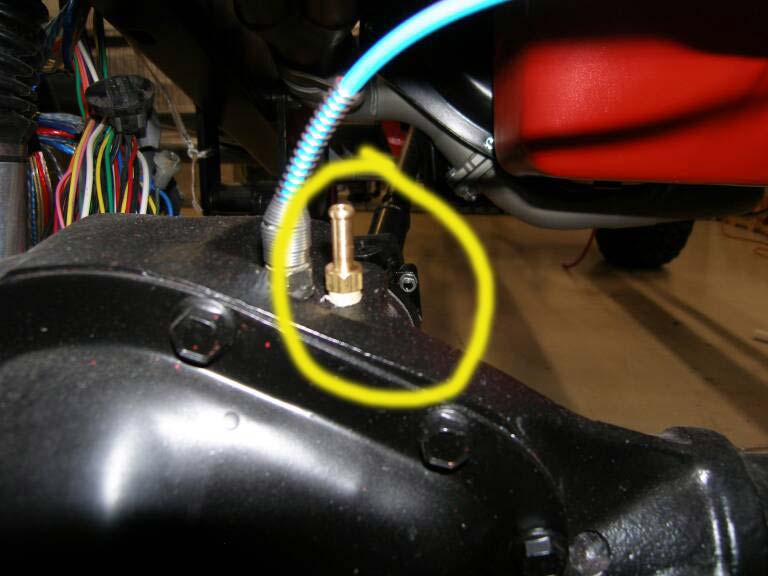
So now that you have a little background about vent style and location, it’s time to consider what you want to do with your axle. The general recommendation is to convert your axle to the top differential housing style if you are currently running axle tube vents that are either the drilled hole or problematic. You may be using a differential cover vent and will be upgrading your cover to a vent-less design. What ever your reason may be, we prefer the upper housing vent location and will show you how easily this can be done.
Though it may sound spooky and difficult to make the conversion to an upper vent, it is actually a pretty easy modification for axles that do not have the vent installed in this location. So let’s get started with your vent modification.
If you have axle tube vents, the vent hole will need to be welded closed or permanently sealed with a sealant or epoxy plug. We recommend welding up the hole but if you do not have welder access, a well applied RTV can make due. Start by roughing up around the hole and then a quick plug weld and your done. After the weld is in place, clean it up with an angle grinder. If you install a new vent but do not plug the axle tube vent, it will be just as bad as never attempting the modification, do not skip this step.

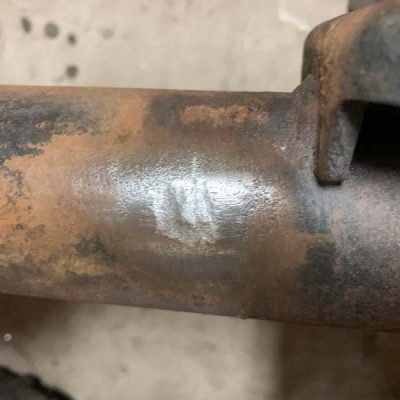
Once you have your old hole plugged, it’s time to place the pilot hole for the new vent. Before starting, you will need to round up the following tools.
- Drill Bit (Size R or 11/32)
- Drill
- Center Punch
- ⅛-27 pipe thread tap (NPT)
- Tap holder
- Tapping oil
The location is important but not overly critical. You will want to center punch a point about ½ to ¾ of an inch from the aft corner of the differential top flat, usually located to the right side of the differential housing. This will put the hole right over the pinon and the pinion oil block cast into the housing just where Dana/Spicer placed it on their factory axles. Next, with a well lubricated drill bit, drill right through the housing. The metal is about an inch thick, you will go through it quickly because the softer cast steel used in differential housings is quick to cut. It is best to do this with the differential cover off, you will need to clean up the shavings/swarf after you are done. If you are very careful and use a greased drill bit, you may be able to get away with not removing the cover.


After your hole is drilled and deburred, it’s time to start tapping the hole. Insert the ⅛-27 NPT tap into the tap holder and slowly start working the tap in and out of the hole. Use a liberal amount of oil or cutting fluid on the tap. As you insert the tap into the hole, ensure to maintain it perpendicular to the flat of the housing and only thread it in until heavy resistance is felt. Some resistance is natural but once the resistance feels like it may jam the tap, its best to reverse it out of the hole, clean out the cutting chips, and rethread the tap pushing ever further with each attempt. After a few cycles of tapping and cleaning, you will be all the way through and done with the tough part.
At this point, you will want to revisit steel shavings/swarf in the differential housing because the tapping process will generate more. You may also have a lip of steel on the edge that was pushed out during the drilling process. A debur tool can quickly remove this lip if its problematic, but a little lip won’t hurt anything.
Ok, now that we have the new vent hole tapped in our Dana 44, we need to decide on what type of vent to use.
Rattle valve directly
This is an OEM style solution, this is where the rattle valve is directly threaded into the Dana 44 axle housing. If you plan on never getting in water, this solution may be good enough for you. The trouble is that even in the most desert of environments, there may be a stream crossing or water filled pot hole that needs to be crossed, making this the least preferred option.
Rattle valve on the end of rubber hose
This can be found on late model OEM style installs. The check valve is inserted into a rubber hose that is then connected to a tubing barb installed on the axle housing. The challenge of this style of axle venting is making sure you get the rubber hose and rattle valve higher than the highest point you think water will ever make it. Some run it up to the body undercarriage or a wheel well. Others will even run it to the engine bay and make sure the valve is higher than the engine intake. This is a great solution, just make sure you tie the hose and valve up in a secure way.
Expansion Valve
A newer solution is using an expanding volume valve. These are great because they allow axle air to escape into a sealed system that can then allow the air to return to the axle once the oil cools. Since it is sealed, you do not need to worry about dirt and water getting in, now long vent tubes to locate or tie up, and it is easily located on the axle housing in some cases. The sealed expansions do have some maintenance, you will need to inspect the expanding membrane to ensure it is not cracked or perforated.
So you know a little more about how air escape works in you Dana 44. Hopefully this information keeps your axles full of oil without the intrusion of water or dirt. This guide is specific to the Dana 44 but is fully applicable to other vented axles, Dana 27 30 35 50 60 70 80 and others.
If you need help with your axle venting, please contact us at Slickrock4X4 and we would be happy to help you get the right solution for you.

